To-do for today’s class
- Download starter file: lect18-detail-insert/ (Google Drive)
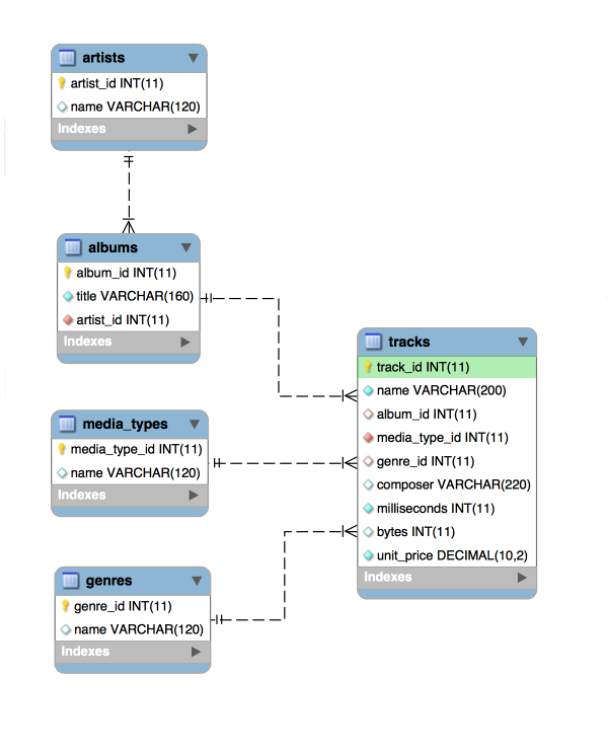
- Refer to song database diagram:
Slides
Link to download PDF version.
Link to download PDF version.
When & Where: Online, through Gradescope.com can start the exam between Thu, 04/07 12:00 pm to Fri, 04/08 6:00 pm.
Length & Format: 80 minutes, online exam.
Topics: Database Basics, Database Design (Lecture #13) to CRUD Part 2 (Lecture #19)
Types of Questions:
How to take the exam:
Important Notes:
Tips:
Study Guide:
Short Coding Sample questions:
For this assignment, you will complete a CRUD application using your DVD database.
Note: samples below don’t always meet all the requirements. Make sure to follow the requirements rather than solely relying on the samples.
http://304.itpwebdev.com/~zune/assignment_07/index.php
Browsers like to cache previous versions of your web files. After you upload the completed files to the server and test them, you might notice that your changes are not showing. For example, add a new DVD and search for it. If the new DVD does not show up in the search_results.php, your browser may be caching a previous version of this file.
If this happens, open MySQL Workbench and double-check that your database is accurate. Then, try to hard refresh the page by pressing Shift on your keyboard while clicking the refresh icon in the browser. This will force the browser to show the late version of the file.
value attributes,<input type='date'...>).value attributesPlease follow the submission requirements below carefully. You will be deducted points for not following submission requirements to the teeth.
public_html folder.public_html folder by clicking on the +Folder button on the top left.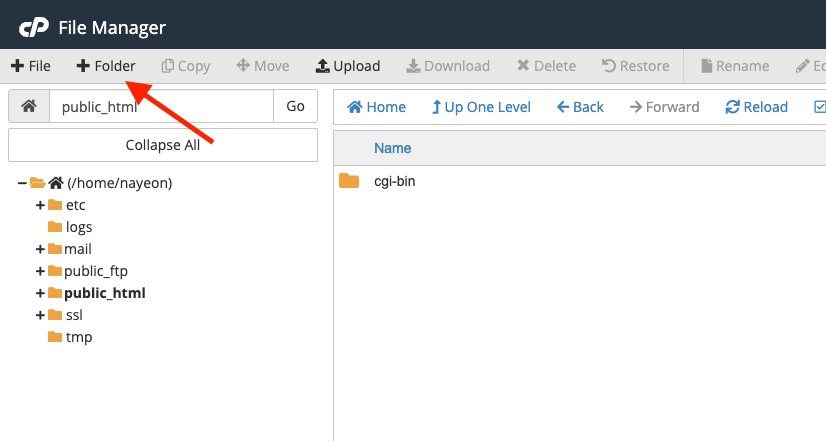
assignment09. Double click it to navigate inside this folder.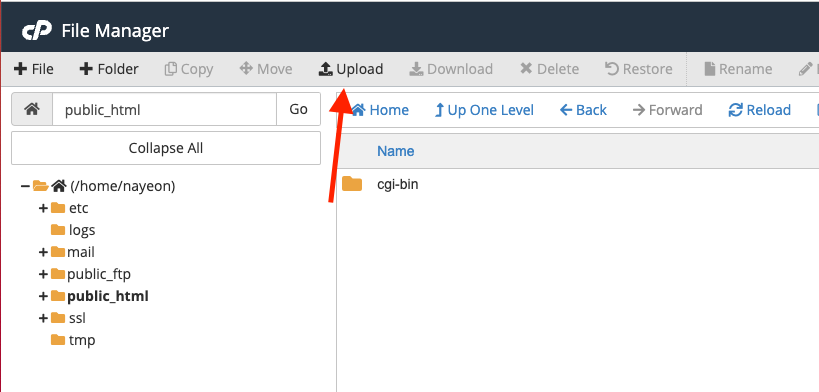
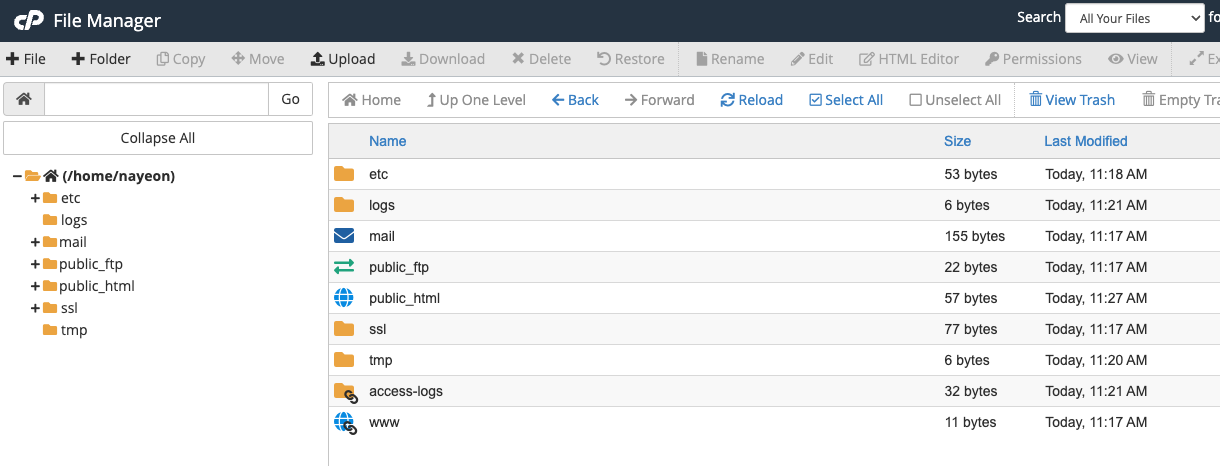
http://303.itpwebdev.com/~yourusername/assignment09/index.php to check that the assignment file has been uploaded correctly.student_page.html that you created in Lab 2. Add a link to this assignment to student_page.html under the heading “Assignments” so that the graders can easily access your completed assignment.student_page.html to the itpwebdev server via cPanel -> Files -> File Manager. If it asks you want to overwrite the previous file, click Yes.http://303.itpwebdev.com/~yourusername/student_page.html and check that the link to this assignment is there. The TAs/graders use this link to access your assignment so make sure this is working! Below is a screenshot sample of what it should look like.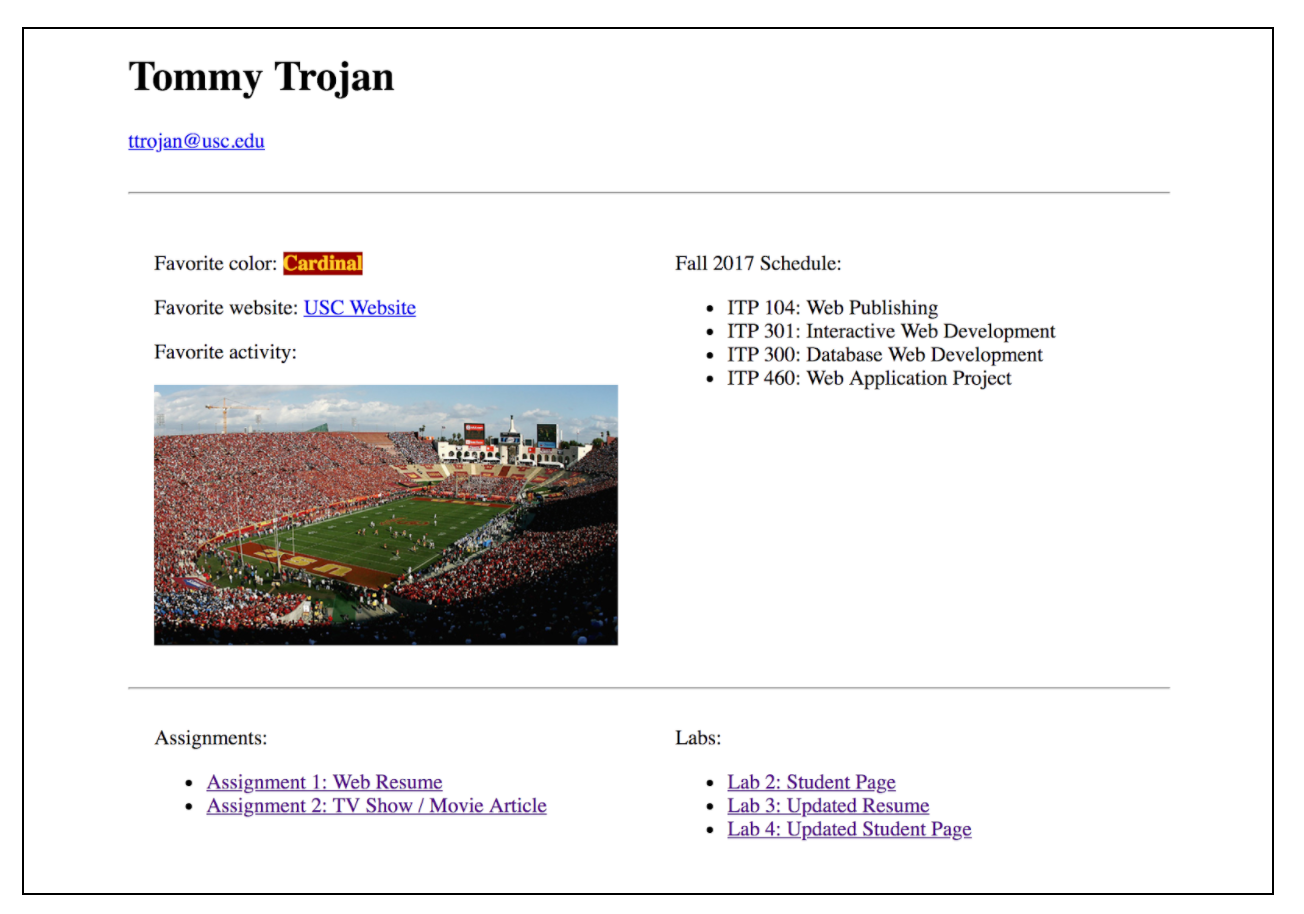
.zip file and upload it to Blackboard. On Blackboard, go to Assignments -> Assignment 9: CRUD DVD App. You will get some points deducted for not uploading correctly but at least you will not get a zero.For this lab, you will create the detail pages using your DVD database.
Note: samples below don’t always meet all the requirements. Make sure to follow the requirements rather than solely relying on the samples.
http://303.itpwebdev.com/~nayeon/dvd-details/
search_result.php and link that result to the detail page.Please follow the submission requirements below carefully. You will be deducted points for not following submission requirements to the teeth.
public_html folder.public_html folder by clicking on the +Folder button on the top left.lab10. Double click it to navigate inside this folder.http://303.itpwebdev.com/~yourusername/lab10/search_form.php to check that the assignment file has been uploaded correctly.student_page.html that you created in Lab 2. Add a link to this assignment to student_page.html under the heading “Assignments” so that the graders can easily access your completed assignment.student_page.html to the itpwebdev server via cPanel -> Files -> File Manager. If it asks you want to overwrite the previous file, click Yes.http://303.itpwebdev.com/~yourusername/student_page.html and check that the link to this assignment is there. The TAs/graders use this link to access your assignment so make sure this is working! Below is a screenshot sample of what it should look like..zip file and upload it to Blackboard. On Blackboard, go to Assignments/Labs -> Lab 10: DVD Detail Pages. You will get some points deducted for not uploading correctly but at least you will not get a zero.MySQLi documentation: http://php.net/manual/en/book.mysqli.php
Link to download PDF version.
This assignment will help you get more practice with PHP syntax, form variables, and conditional statements
See working sample here: http://303.itpwebdev.com/~ta303/samples/lab-php-form/form.php
If not sure how to address certain edge cases, try out the sample and match your output to what the same outputs.
form.php)
<form> tag’s action and method attributes appropriately. submit_form.php.submit_form.php)
text-danger for red text and the class text-success for green text.date function to see how to get the formatting exactly right.submit_form.php after the form is submitted: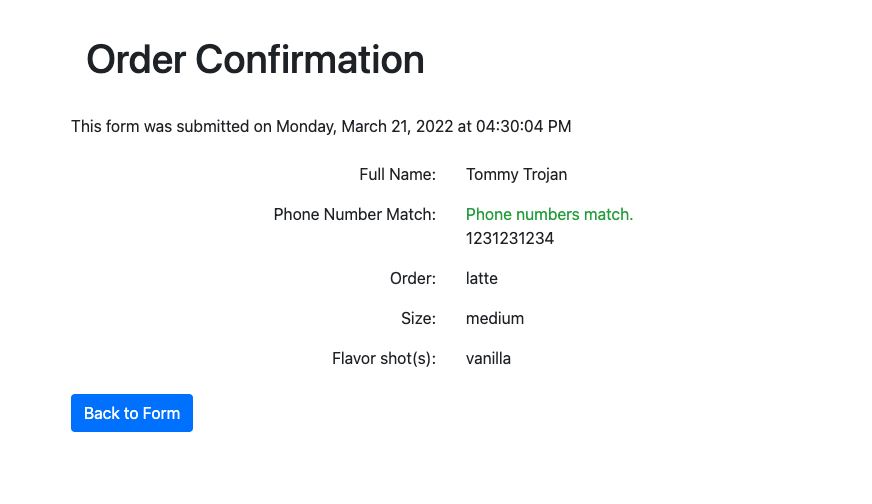
Please follow the submission requirements below carefully. You will be deducted points for not following submission requirements to the teeth.
public_html folder.public_html folder by clicking on the +Folder button on the top left.lab09. Double click it to navigate inside this folder.http://303.itpwebdev.com/~yourusername/lab09/form.php to check that the assignment file has been uploaded correctly.student_page.html that you created in Lab 2. Add a link to this assignment to student_page.html under the heading “Labs” so that the graders can easily access your completed assignment.student_page.html to the itpwebdev server via cPanel -> Files -> File Manager. If it asks you want to overwrite the previous file, click Yes.http://303.itpwebdev.com/~yourusername/student_page.html and check that the link to this assignment is there. The TAs/graders use this link to access your assignment so make sure this is working! Below is a screenshot sample of what it should look like..zip file and upload it to Blackboard. On Blackboard, go to Assignments/Labs -> Lab 9: PHP Form Output. You will get some points deducted for not uploading correctly but at least you will not get a zero.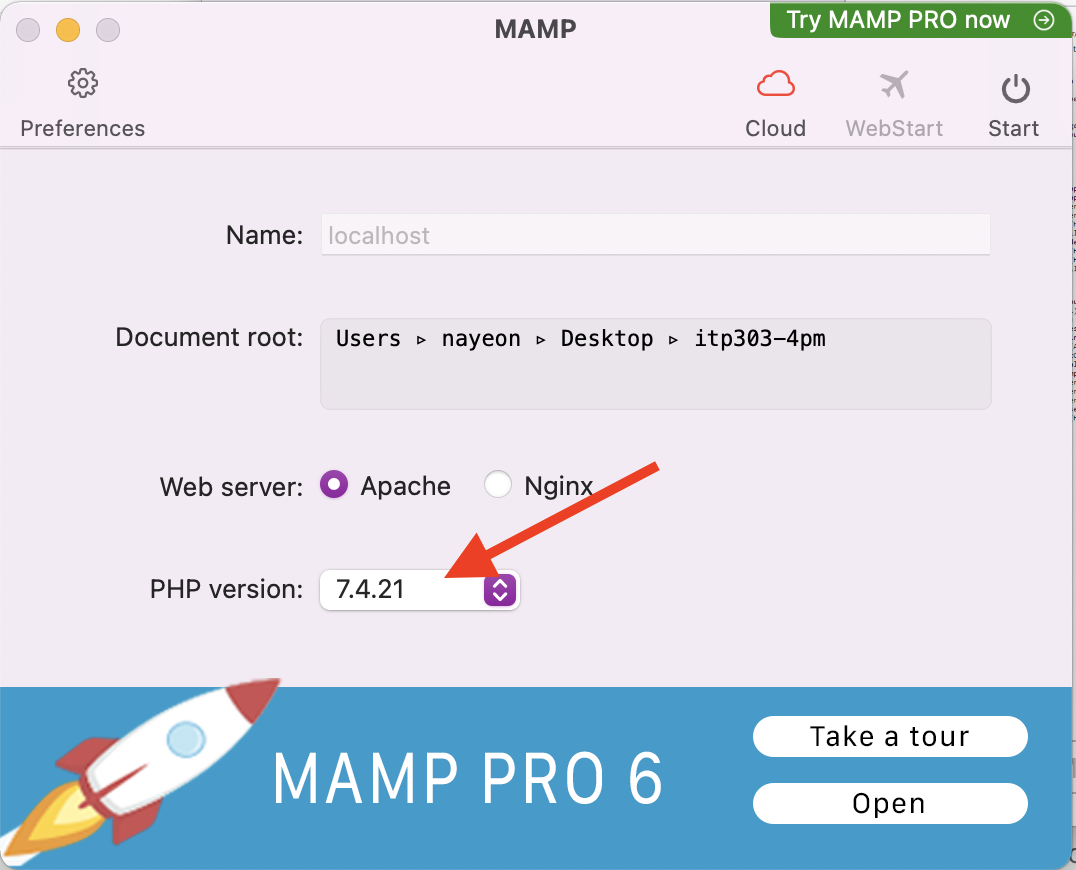
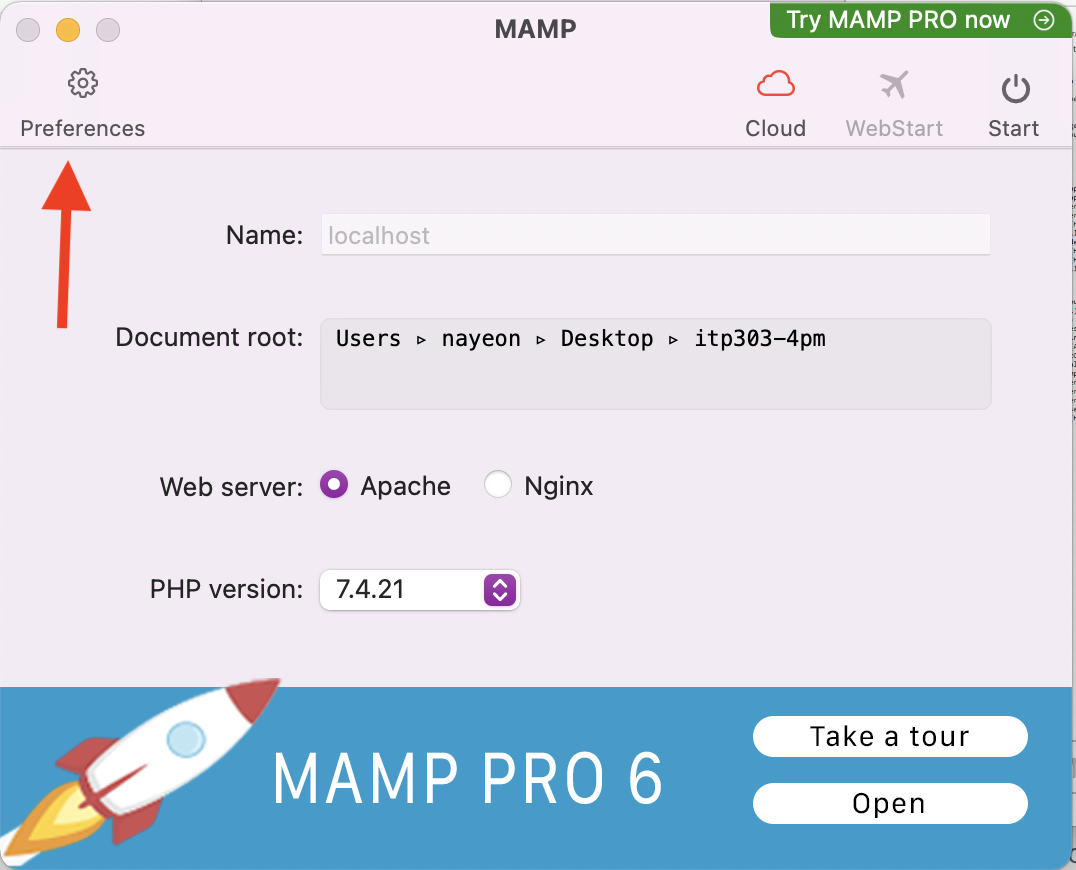
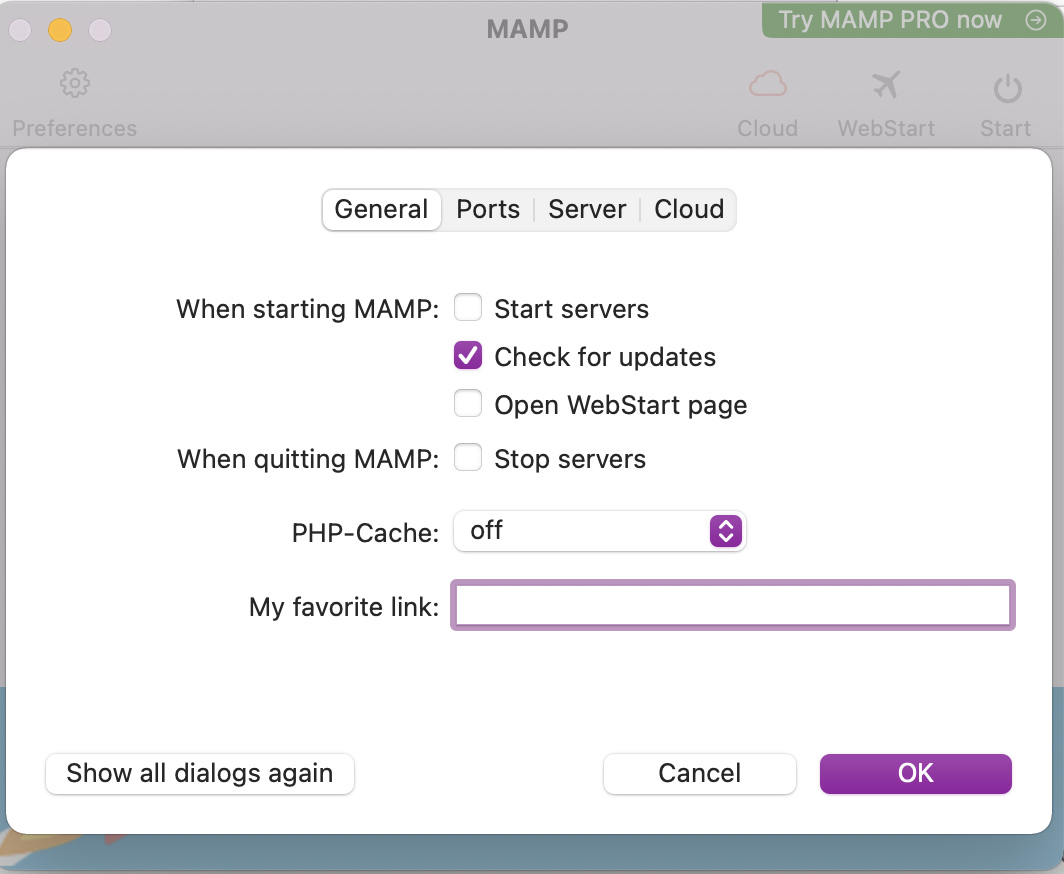
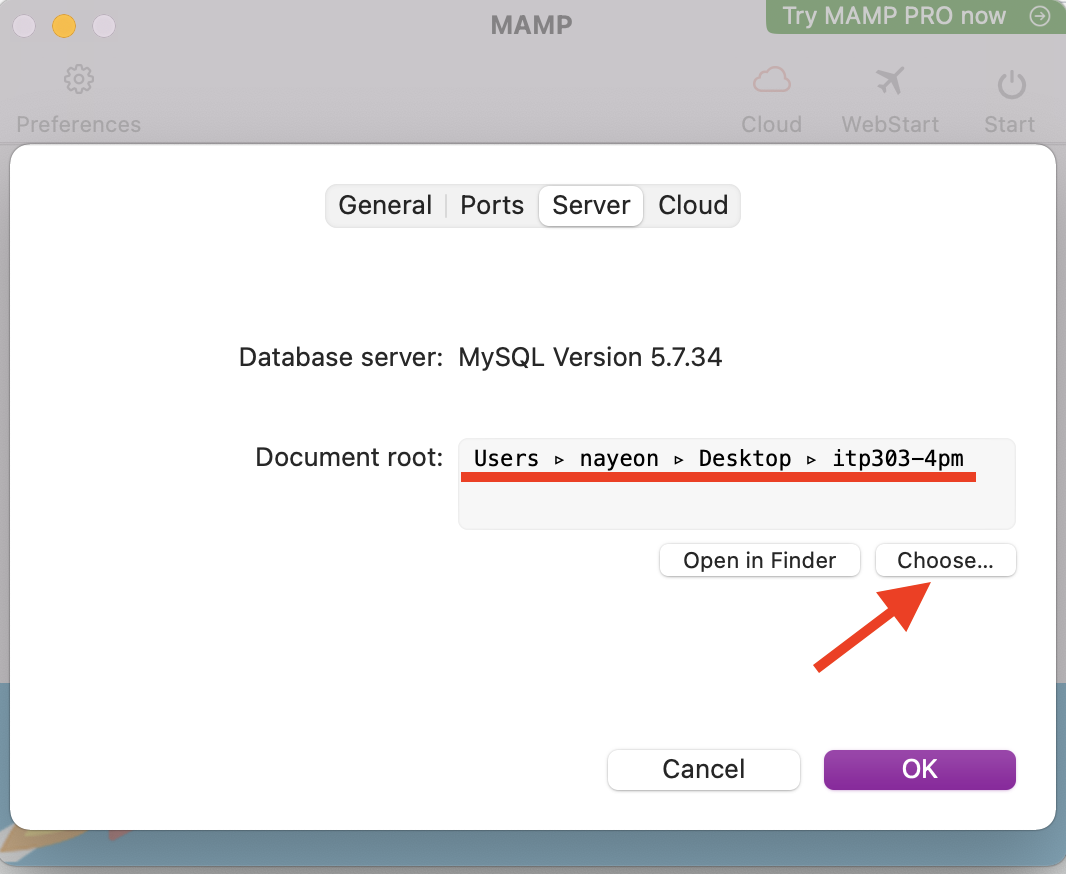
php.ini file, which is a configuration file that allows you to configure many aspects of PHP.
/Applications/MAMP/bin/php/php{version_num}/conf/php.iniC://MAMP/conf/php{version_num}/php.inidisplay_errors. You will see a few results. Look for a statement that reads display_errors = Off, which is around line 472.display_errors = On. Note the capital “O” on On. This will make PHP show errors on the browser while you write PHP. This is super helpful during development.
Link to download PDF version.
date() function: http://php.net/manual/en/function.date.php$_SERVER: http://php.net/manual/en/reserved.variables.server.phpFor this assignment, you will create search form and search results page for DVD database. All data and results should be dynamic and come directly from the database.
Note: samples below don’t always meet all the requirements. Make sure to follow the requirements rather than solely relying on the samples.
http://303.itpwebdev.com/~nayeon/a08-dvd-search/search_form.php
value attributesvar_dump out the variables you are getting passed through from the Search Form. This will help you write out the SQL statement.GET or POST?
value to determine which radio button was selected.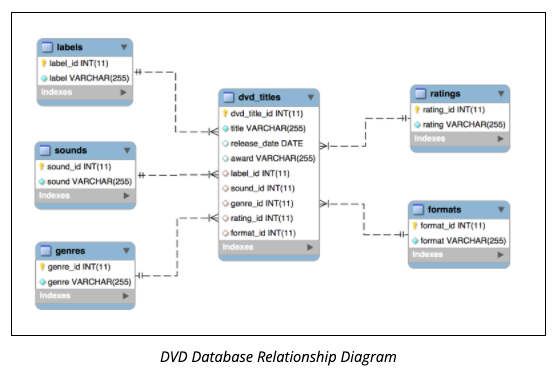
Please follow the submission requirements below carefully. You will be deducted points for not following submission requirements to the teeth.
public_html folder.public_html folder by clicking on the +Folder button on the top left.assignment08. Double click it to navigate inside this folder.http://303.itpwebdev.com/~yourusername/assignment08/search_form.php to check that the assignment file has been uploaded correctly.student_page.html that you created in Lab 2. Add a link to this assignment to student_page.html under the heading “Assignments” so that the graders can easily access your completed assignment.student_page.html to the itpwebdev server via cPanel -> Files -> File Manager. If it asks you want to overwrite the previous file, click Yes.http://303.itpwebdev.com/~yourusername/student_page.html and check that the link to this assignment is there. The TAs/graders use this link to access your assignment so make sure this is working! Below is a screenshot sample of what it should look like..zip file and upload it to Blackboard. On Blackboard, go to Assignments -> Assignment 8: DVD Search Pages. You will get some points deducted for not uploading correctly but at least you will not get a zero.
Class was not held in person on this day. See edstem announcement for details.
Link to download PDF version.
This lab helps you practice more SQL statements that manipulate the database, such as insert, update, and deleting records. You will write five SQL statements against the Song database.
Create one .sql file for all five SQL statements. Use comments to write the prompt above each SQL statement.
Part 1 – Song Database
mpeg_tracks that displays all tracks with MPEG audio file format. Display track name (alias: track_name) artist name (alias: artist_name), composer, album title (alias: album_title), and media type (alias: media_type). Sort results in alphabetical order by track name.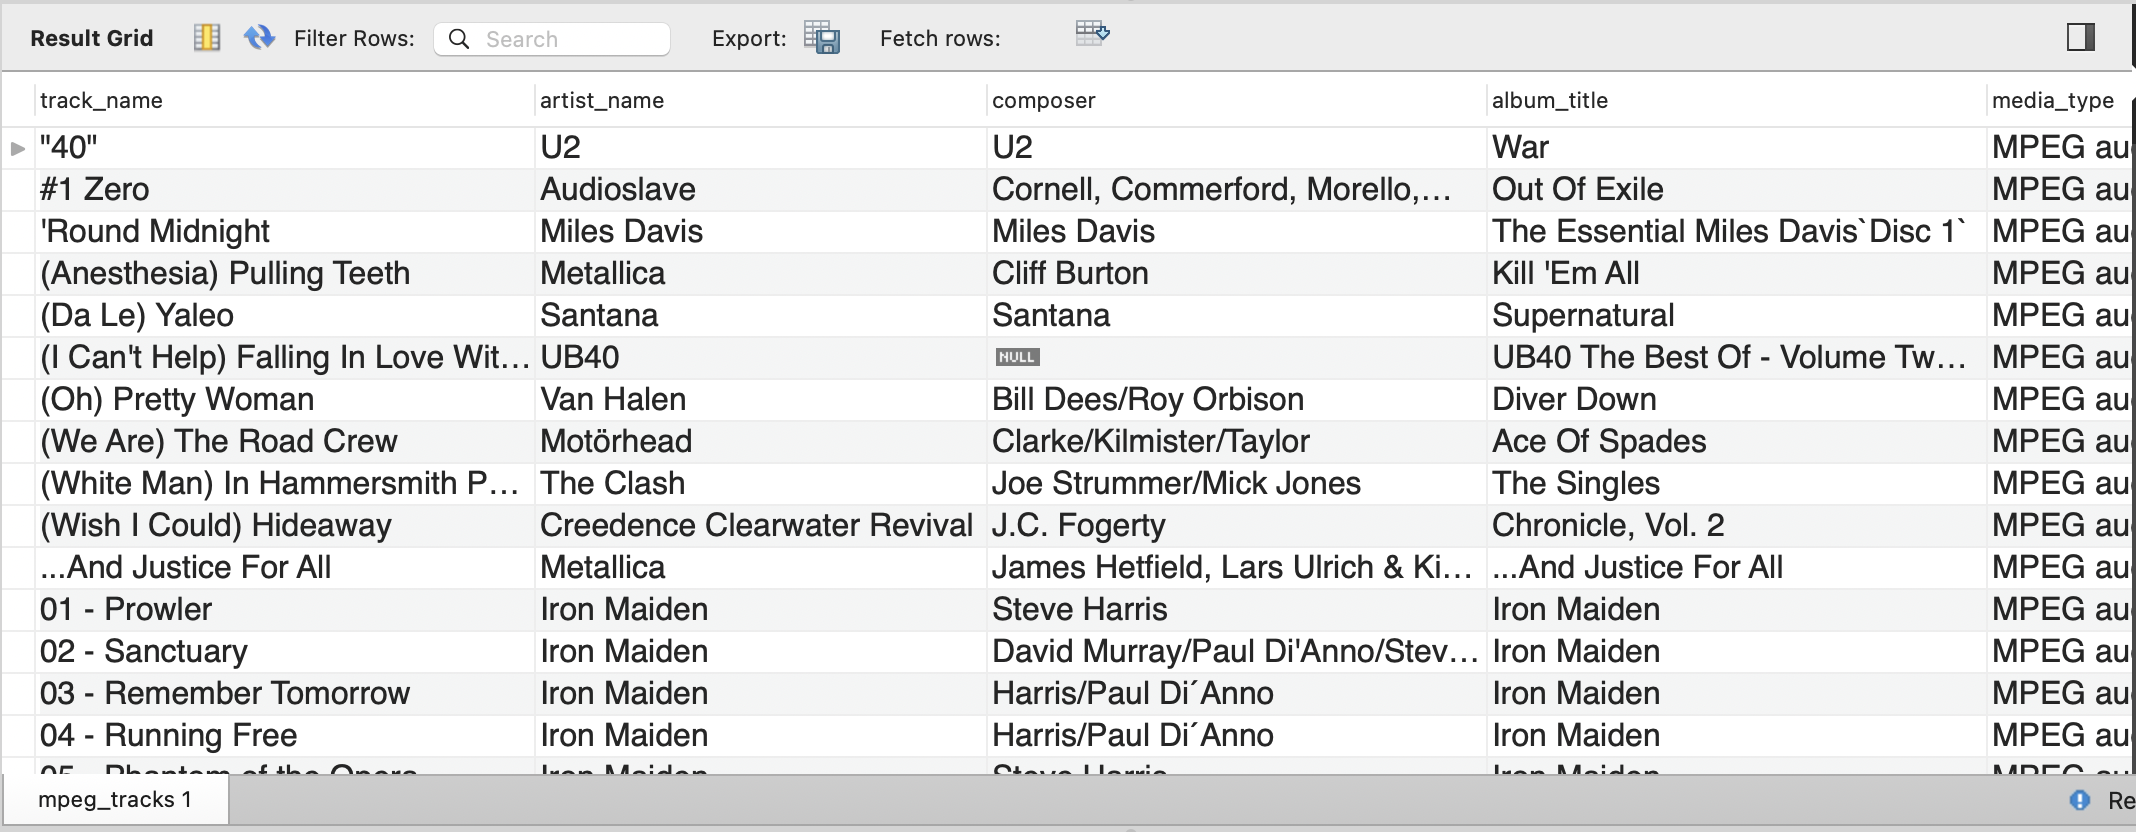
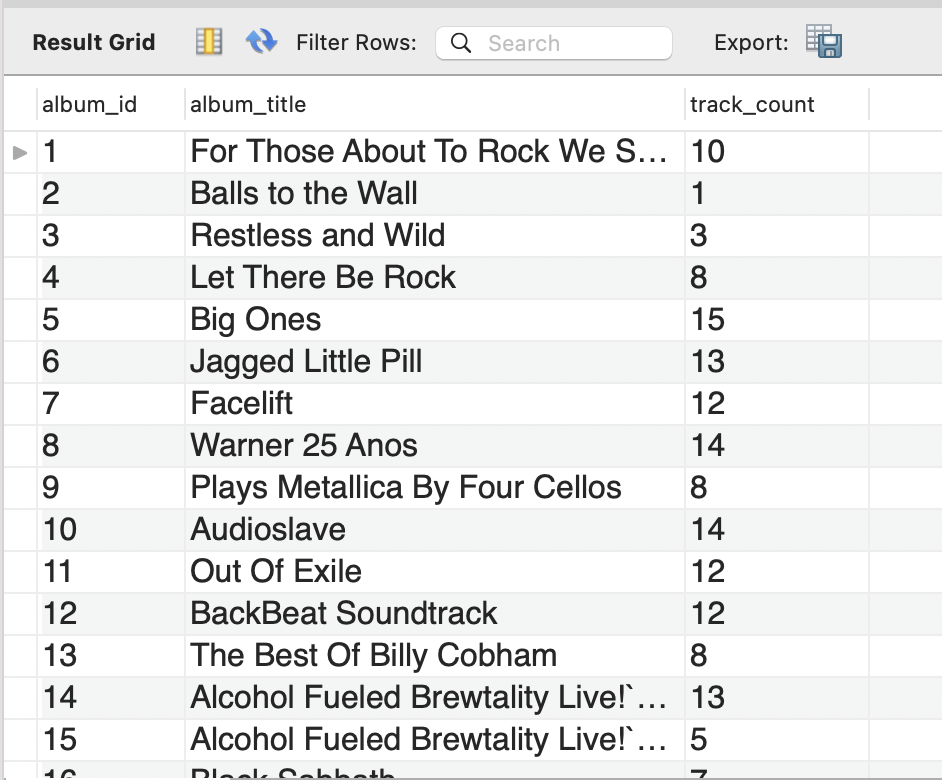
album_title), and track count (alias: track_count).
When complete, you must upload the completed .sql file to Blackboard. Go to Assignments/Labs -> Lab 8: More SQL Statements and upload the file.