Overview
For this assignment, you will create a simple To Do List app using jQuery. This assignment will also help you review your HTML and CSS skills in preparation for the upcoming midterm exam.
Suggested approach: start with HTML first and make the delete / add functionalities work. Work on styling at the very end. Following the requirements step by step is highly recommended.
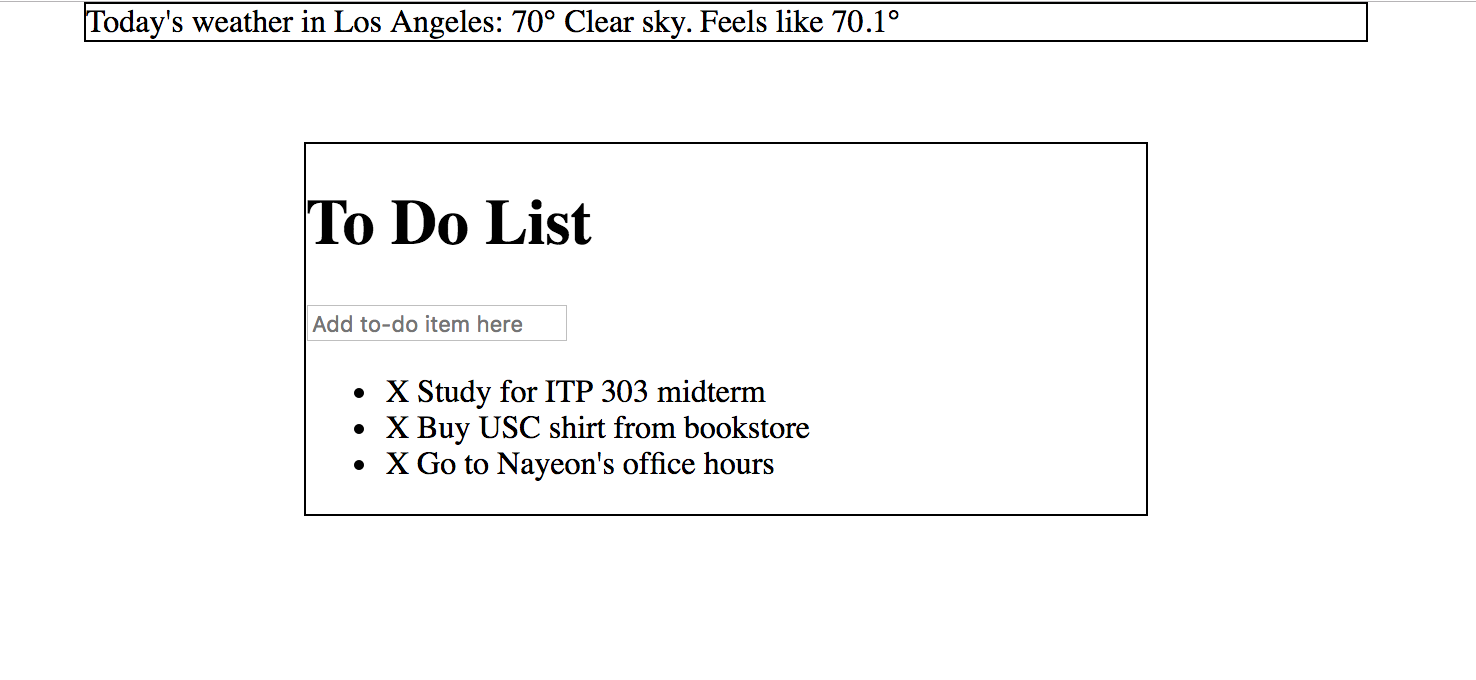
Sample
Note: Samples below don’t always meet all the requirements. Make sure to follow the requirements rather than solely relying on the samples.
Requirements
Note: Steps 1-3 are from this week’s lab. If you have submitted the lab, make copies of the lab files for assignment 6. Do not modify lab files past the lab deadline!
- Code set-up
- Write all HTML in a file named
todolist.html.
- Write all CSS in a file named
style.css file.
- Write all JS in a file named
main.js file.
- Include the jQuery library in your
.html file.
- Link the CSS file and JS file in your
.html file.
- You can add your
.js file in your .html file by using <script src="name_of_file.js"></script>
- Use jQuery for all your DOM manipulation and event listening. You will write very little vanilla JS.
- Note you can still use JavaScript along with jQuery. For example:
$("button").on("click", function() { //jQuery way of writing event handlers
    let isOn = true; // JS way of creating variables
    if( isOn == true) { // JS way of if/else statements
        $("input").val("The app is on");
    }
});
- Today’s weather information is displayed at the top of the page.
- Use Weatherbit.io’s API to get this information. You will need to create a free account to obtain an API key.
- Read the documentation to find out how to get the weather in Los Angeles.
- Get the temperature, a description, and the apparent temperature (“feels like”).
- The temperature must be in Fahrenheit.
- To Do list structure
- Create a container that will hold all your to do list items. The container should be between 400 – 600px wide.
- At the top of the list, add a heading that reads “To Do List.” Add a background color of your choosing.
- Below the heading, add an input area that allows users to type in a to do item here.
- Include a placeholder that reads “Add to-do item here”.
- Do not add a “Submit” button.
- Below the input area, create a list of to do items using the
<ul> tag. By default, have at least three items hardcoded.
- Change the city and remember the city
- Add a dropdown at the top of the to do list. Add three cities of your choices as options in the dropdown (Los Angeles can be one of them).
- When user changes the dropdown, call the Weatherbit API again and get the weather for the city that the user selected.
- Save the city that the user chose last in Local Storage.
- When the page is refreshed, the city selected in the dropdown must be the city that the user chose last (retrieve from Local Storage).
- Deleting an item
- Have three items hardcoded in so that you can easily test the delete function.
- When a user clicks on the to do item text (not the square), change the color of the item and strike it out. Both of these changes can be done using CSS properties. When a user clicks on the to do item text again, change the text style back to normal.
- When a user clicks on the square (or
X if you have not replaced it with a square icon yet) next to the to do item, remove the to do list item entirely from the DOM.
- Fade out the item before removing it.
- Hint: there is a jQuery method that removes DOM elements.
- The to do item must be removed ONLY when the square is clicked.
- If the item is not crossed out and a user clicks on the square button, do not cross out the item when it is removed. The item must only be removed and not crossed out.
- Adding an item
- A to do item is added to the bottom of the list when a user types into the input area and presses the ENTER key. There is no button to submit this information.
- Hint #1: Forms get submitted when user presses ENTER key.
- Hint #2: jQuery has a method that allows you to easily append items.
- After adding an item, try to delete the item that was just added. You may find that you cannot delete the dynamically created item. Read about Event Delegation and Event Propagation here to help you solve this problem: http://learn.jquery.com/events/event-delegation/
- Styling
- Icons – The square icon and plus icon shown in the sample are from the icon library Font Awesome here: https://fontawesome.com/. You can read their documentation to learn how to use these icons OR you can use emojis instead from: https://emojipedia.org/
- You are free to use any icons you wish. You do NOT have to use the square or plus icon shown in the sample, but do pick icons that make sense 🙂
- If using emojis, you can simply copy paste the emoji into your code.
- Font Family – Choose a font family that is not a default web font (e.g. Arial or Times New Roman). Google Fonts is a great resource.
- Colors – Choose your own colors. Colors do not need to match the given sample.
- Add a background color for the whole browser.
- Add a background color where you display the weather information.
- Hover effect – When a user hovers over any of the list items, change its background color to a color of your choosing.
- Box-shadow – Not discussed in lecture before, but it is a neat CSS property that enhances the look of the list. Add a box shadow around the container of the to do list.
- Read more about the box-shadow property at MDN.
- A quick google search will reveal many sites that generate box-shadow effects for you.
- The plus icon
- When the plus icon is clicked, show / hide the input area.
- Add an effect so that it feels the input area is sliding up and down. See sample for details.
Submission/Upload to the server
Please follow the submission requirements below carefully. You will be deducted points for not following submission requirements to the teeth.
- Open a browser and go to https://303.itpwebdev.com/cpanel (it will redirect you to https://54-148-150-30.cprapid.com:2083/).
- Login with your username and password (this password does not sync with your USC NETID password. You set this password in Lab 1. If you don’t remember your password, post on EdStem and a course staff member will reset it for you).
- Scroll down to Files section and click on File Manager. You will see a list of folders and files like below.
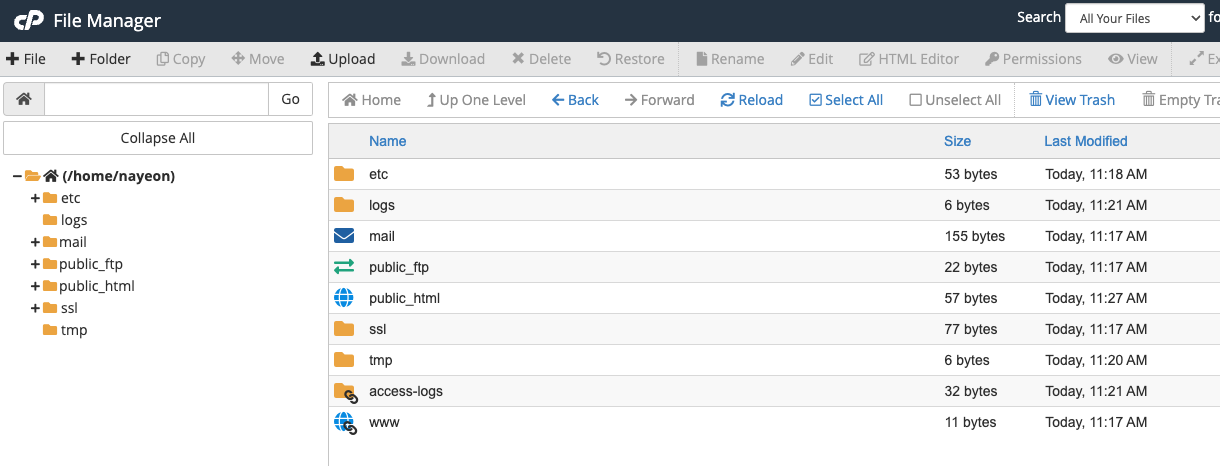
- Double click to navigate inside the
public_html folder.
- Create a new folder inside the
public_html folder by clicking on the +Folder button on the top left.
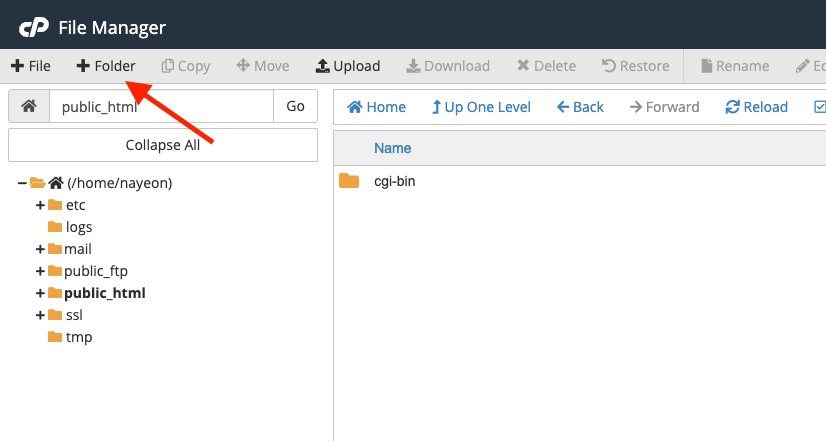
- Name the folder
assignment06. Double click it to navigate inside this folder.
- Click on “Upload” to upload all assignment6 files to this folder.
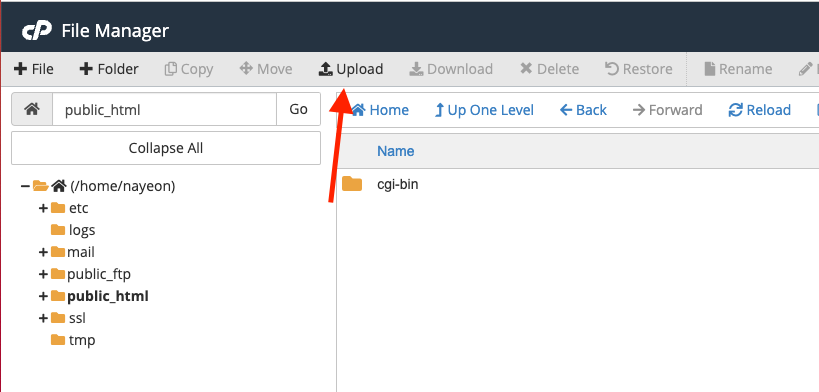
- Drag and drop all assignment files to upload into this folder.
- In your browser, go to
http://303.itpwebdev.com/~yourusername/assignment06/todolist.html to check that the assignment file has been uploaded correctly.
- One last thing. In your computer, open up
student_page.html that you created in Lab 2. Add a link to this assignment to student_page.html under the heading “Assignments” so that the graders can easily access your completed assignment.
- Re-upload the updated
student_page.html to the itpwebdev server via cPanel -> Files -> File Manager. If it asks you want to overwrite the previous file, click Yes.
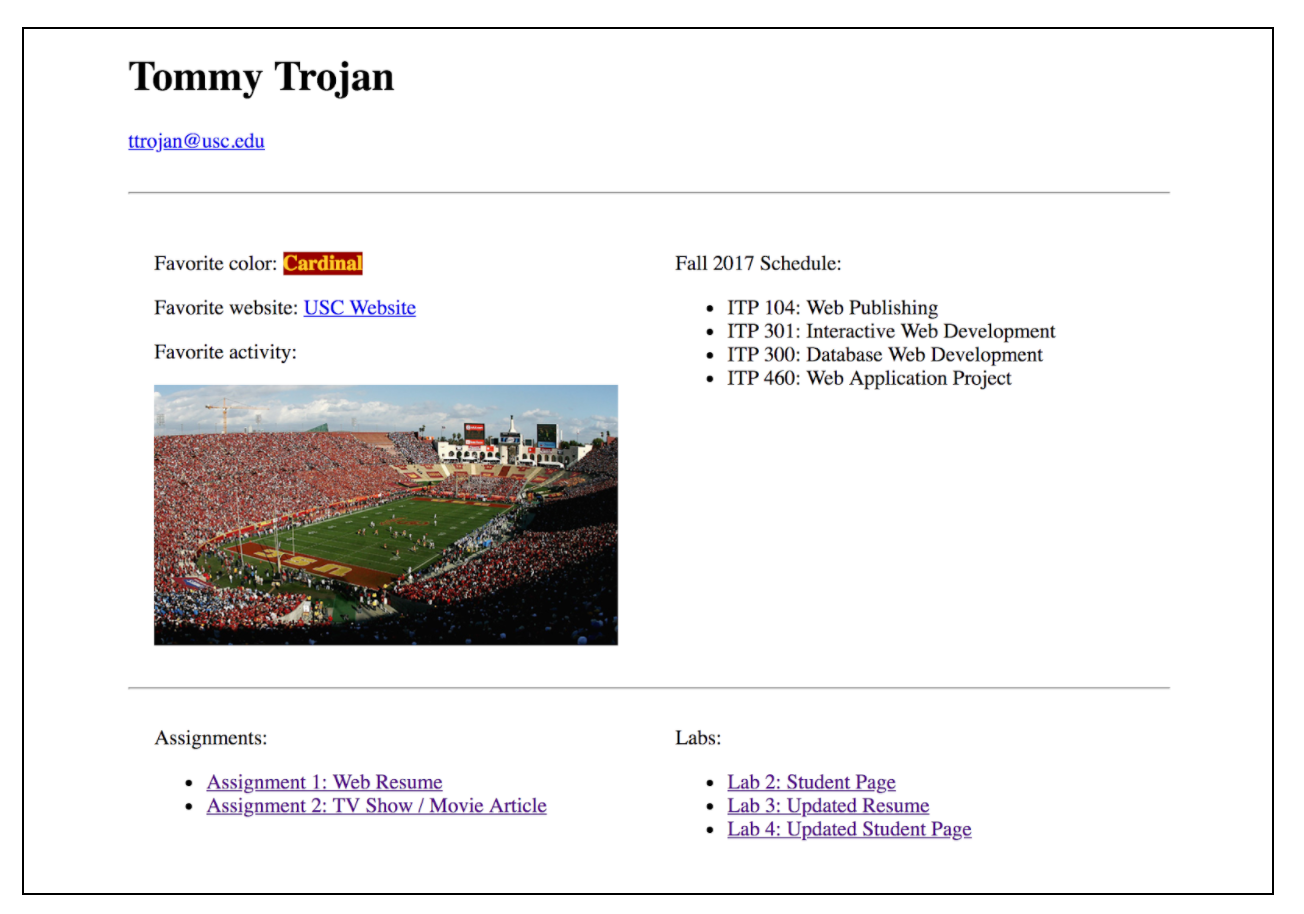
- If all the above is completed, go to your student page at
http://303.itpwebdev.com/~yourusername/student_page.html and check that the link to this assignment is there. The TAs/graders use this link to access your assignment so make sure this is working! Below is a screenshot sample of what it should look like.
- (Optional) If you are having trouble uploading to the server and cannot upload on time, add all files for this assignment in a folder, compress it as a
.zip file and upload it to Blackboard. On Blackboard, go to Assignments -> Assignment 6: To Do List. You will get some points deducted for not uploading correctly but at least you will not get a zero.