Lab 5: Contacts List

Overview

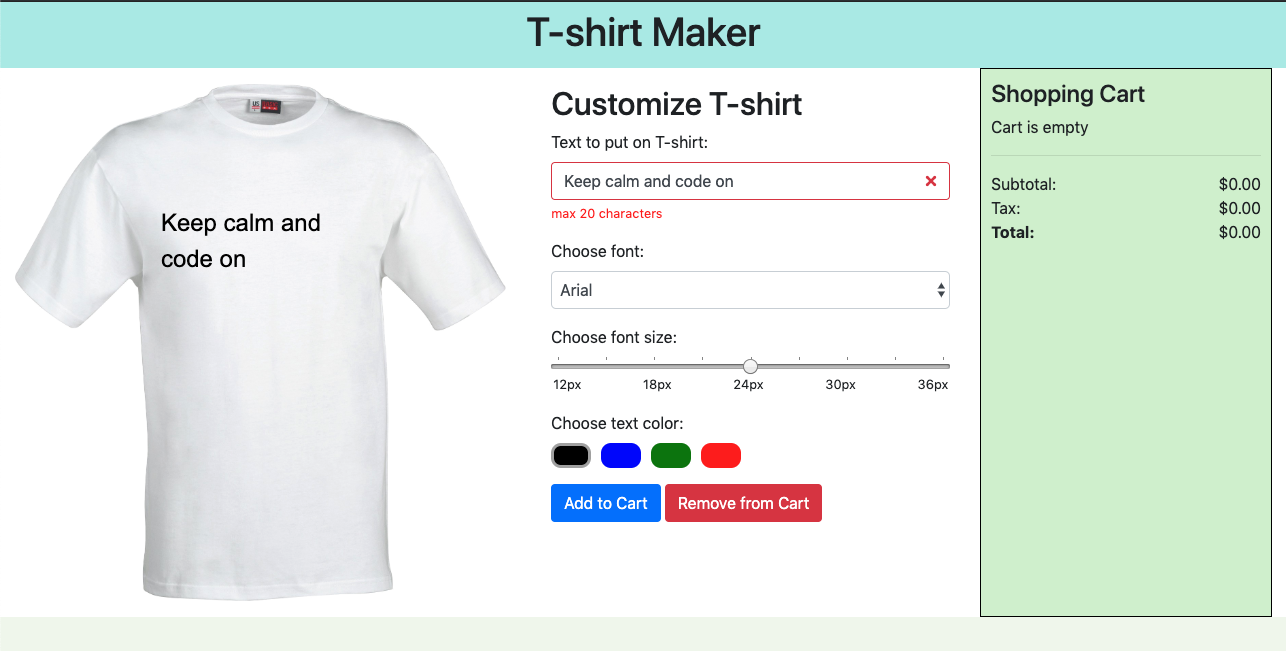
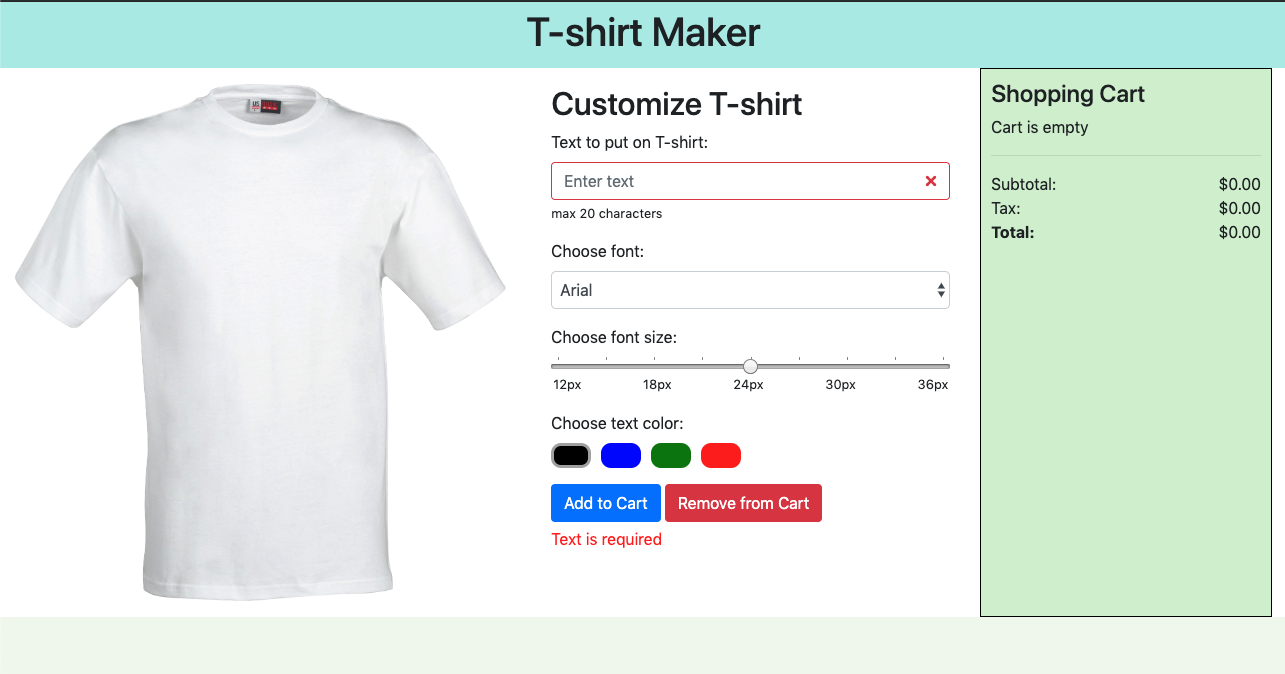
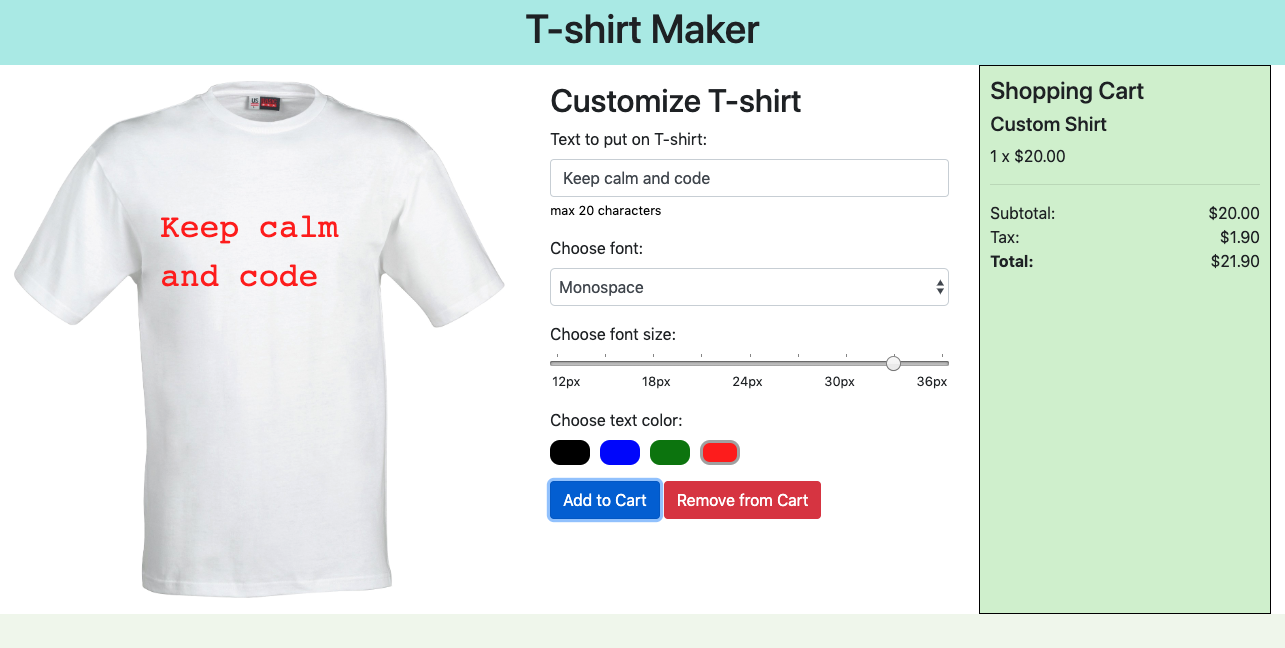
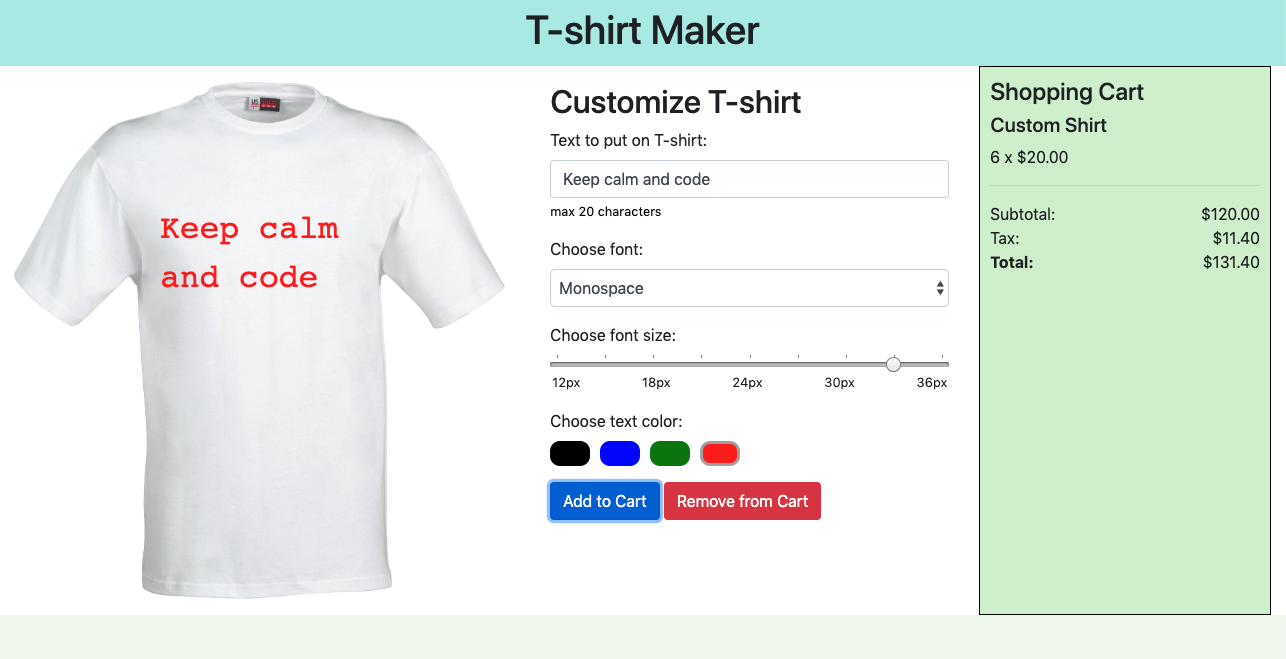
For this lab you will practice creating JavaScript objects by implementing a Contact List application. Users will be able to add new contacts, display all contacts, display first three contacts, and clear the list.

Sample

Requirements

  1. Download the starter file from: lab05-contact-list.
  2. Do not change the HTML or CSS code. You only need to write JavaScript.
  3. Do not use inline JavaScript. This is bad practice. Write event handler like we did in class.
  4. Open up console and console.log() things out as you work on this lab.
  5. A contacts array is created for you. You will be storing any newly created contacts as an object and storing it in this array.
  6. Create an event handler for form submission. When the form is submitted:
    1. Check that all input fields are filled out.
    2. If all inputs are filled out, save the information into an object. The object must have these properties:
      1. firstName: property that stores user input for First Name.
      2. lastName: property that stores user input for Last Name.
      3. email: property that stores user input for Email.
    3. Add this object to the contacts array .
    4. If any of the inputs are not filled out, do nothing. Do not add create an object or add it to the array. For this lab you do not need to display any error messages.
  7. Create an event handler for Show All Contacts
    1. Run through the contacts array and show all contacts.
    2. To display contacts, create <li> elements and append them to <ul class="list-group" id="contact-list"> on line 52. See line 53 to see a sample of what the <li> element should look like.
    3. Each contact must be styled to look like the sample. Not working? See line 53 to see a sample of what the <li> element should look like.
  8. Create an event handler for Show First Three Contacts
    1. Run through the contacts array and show only the first three contacts.
    2. Display contacts by creating <li> elements like in step #7.
  9. Create an event handler for Delete All.
    1. Remove all objects from the contacts array.
    2. Clear everything from <ul class="list-group" id="contact-list"> so that no contacts are displayed.
  10. Not required but helpful: create functions for anything that is repetitive. For example, you will find yourself needing to clear all contacts multiple times.
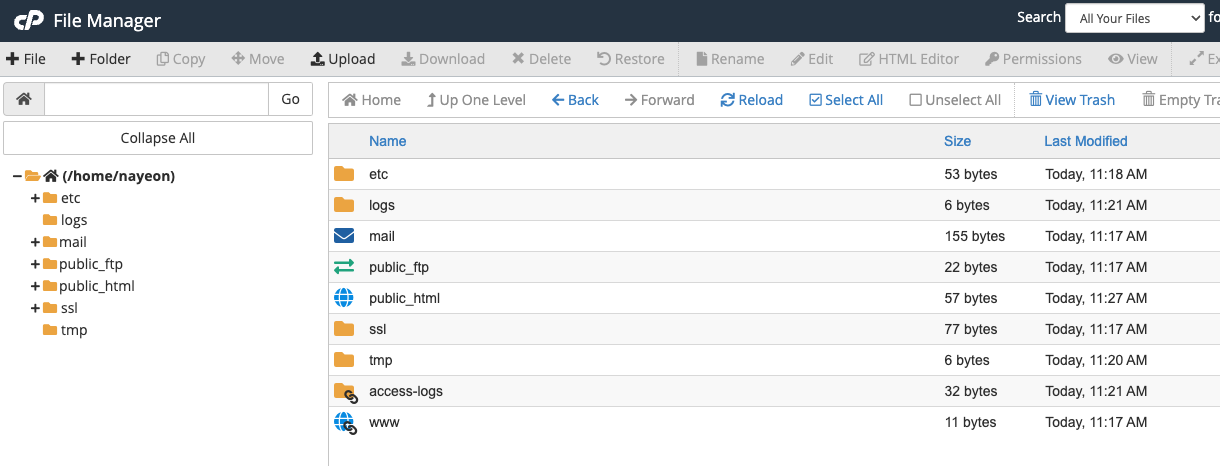
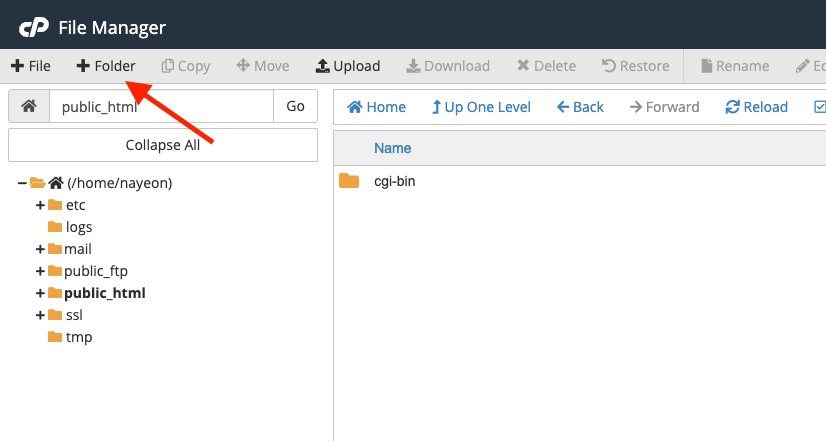
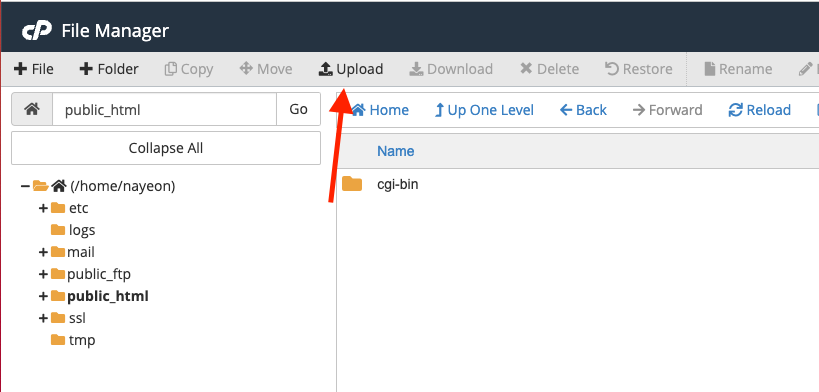
  11. When completed, upload completed file to the server and add a link to this lab in your student_page.html.

Lecture 9: JS Objects, DOM Manipulation

To-do for today’s class

Helpful Readings

Slides

Link to download PDF version.

Completed Files

Lecture 8: JS Numbers, Strings, Objects, User Input

To-do for today’s class

Helpful Readings

Slides


Link to download PDF version of slides.

Resources

Completed Files

Lecture 4: Page Layouts

To-do for today’s class

Slides

View Slides

Link to download PDF version.

Helpful Readings

Completed Files

Completed files are stored in a GitHub repository. Links below will take you to a list of file(s) from today’s lecture. You can view the code via the browser through GitHub’s UI or clone/download the repo to open the code from your computer.

Assignment 4: T-shirt Customizer

Overview

This assignment will help you practice JavaScript basics. The HTML and CSS is provided for you. You only need to write JavaScript to implement all the interactivity.

Sample

Requirements

Setup
  1. Download starter files (Google Drive folder link).
  2. Write all JavaScript in the included .html file.
  3. Do NOT modify the HTML.
  4. You can complete this assignment without modifying the included external CSS file but you may modify it if needed.
    1. Note: The starter file utilizes Bootstrap CSS classes.
  5. Do NOT write inline JavaScript.
  6. Open up the Inspect tool as you work on this assignment. Use the Console to catch errors and use the Elements tab to see how the HTML elements change.
Customizer
  1. Text to put on T-shirt
    1. As user types text into the text field, display the text in <div id="tshirt-preview">. The div is already positioned for you so you do not need to modify any CSS.
    2. If user types in more than 20 characters:
      1. Change the message “max 20 characters” text color to red and add a CSS class .is-invalid to the text input. .is-invalid is a Bootstrap CSS class that automatically gives a red border around the input.
  2. Font, font size, and text color
    1. When user selects a different font in the dropdown, change the t-shirt font to that font.
      1. Use onchange event to detect change in the dropdown and slider.
    2. When user changes the font size slider, change the t-shirt font size to that size.
    3. When user clicks on one of the text color boxes, change the t-shirt text color to that color AND add a gray border around the color box that was clicked on (add CSS class .selected to it).
Add to Cart
  1. When user clicks “Add to Cart”:
    1. Validate that “Text to put on T-shirt” input field is not empty and is not have longer than 20 characters. Show a red error message below the button and add .is-invalid class around the text input to display a red border around it. Do not update the shopping cart if validation rules are not met.
    2. Shopping cart: hide the “Cart is empty” message if above validation rules are met.
    3. Shopping cart: show the t-shirt information that is in the <div class="cart-item">.
    4. Shopping cart: Update the subtotal, tax, and total fields accordingly.
      1. Each shirt base price is $20.00.
      2. Tax rate is 9.5%.
      3. In JavaScript, calculating floating points are not always accurate (e.g. 0.1 + 0.2 does not equal to 0.3). There are ways to go around this issue but for this assignment, it is OK if not exact results are returned.
      4. Use .toFixed() to set two digits after the decimal place. There are known rounding issues with .toFixed() but it is OK if rounding is a little off in this assignment.
    5. Shopping cart: Update the quantity by one every time user clicks “Add to Cart.” Subtotal, tax, and total must be recalculated every time the quantity is updated.


Remove from Cart
  1. When user clicks on “Remove from Cart”:
    1. Shopping cart: show the “Cart is empty” message.
    2. Shopping cart: hide the shirt information
    3. Shopping cart: Reset the Subtotal, Tax, and Total to 0 (zero).
Submission/Upload to the server

Please follow the submission requirements below carefully. You will be deducted points for not following submission requirements to the teeth.

  1. Open a browser and go to https://303.itpwebdev.com/cpanel (it will redirect you to https://54-148-150-30.cprapid.com:2083/).
  2. Login with your username and password (this password does not sync with your USC NETID password. You set this password in Lab 1. If you don’t remember your password, post on EdStem and a course staff member will reset it for you).
  3. Scroll down to Files section and click on File Manager. You will see a list of folders and files like below.
  4. Double click to navigate inside the public_html folder.
  5. Create a new folder inside the public_html folder by clicking on the +Folder button on the top left.
  6. Name the folder assignment04. Double click it to navigate inside this folder.
  7. Click on “Upload” to upload all assignment4 files to this folder.
  8. Drag and drop all assignment files to upload into this folder.
  9. In your browser, go to http://303.itpwebdev.com/~yourusername/assignment04/tshirt-customizer.html to check that the assignment file has been uploaded correctly.
  10. One last thing. In your computer, open up student_page.html that you created in Lab 2. Add a link to this assignment to student_page.html under the heading “Assignments” so that the graders can easily access your completed assignment.
  11. Re-upload the updated student_page.html to the itpwebdev server via cPanel -> Files -> File Manager. If it asks you want to overwrite the previous file, click Yes.
  12. If all the above is completed, go to your student page at http://303.itpwebdev.com/~yourusername/student_page.html and check that the link to this assignment is there. The TAs/graders use this link to access your assignment so make sure this is working! Below is a screenshot sample of what it should look like.
  13. (Optional) If you are having trouble uploading to the server and cannot upload on time, add all files for this assignment in a folder, compress it as a .zip file and upload it to Blackboard. On Blackboard, go to Assignments -> Assignment 4: T-shirt Customizer. You will get some points deducted for not uploading correctly but at least you will not get a zero.

Lecture 7: CSS Positions, JS Events and Traversal

To-do for today’s class

Helpful Readings

Slides

Link to download PDF version of slides.

Completed Files

Lab 4: Photo Gallery

Overview

This lab helps you to solidify the basics of manipulating the DOM with JavaScript and event-based programming with JavaScript. You will create an interactive photo gallery.

Requirements

  1. Download the starter file from this Google Drive link.
  2. Do not change the HTML or the styles.css file.
  3. In the browser, open up the console like in the lecture and have it open as you complete this lab. It will be helpful to see errors right away. You can also log things out on the browser to test your code.
  4. Write all CSS and JavaScript in gallery.html.
  5. Review the HTML structure. Note that name of each thumbnail’s name is in a child div.
  6. Write CSS in the <style> tag so that when a user hovers over a thumbnail:
    1. Name of the place is displayed on top of the thubmail. Use CSS position property to achieve the overlapping effect.
    2. Change the text color of name to white.
    3. Change the background color of name to a slightly transparent black. Background width is as wides as the thumbnail.
      1. Hint: Use rbga() as background color to make background color slightly transparent.
    4. Position the name so that it is displayed at the bottom of each thumbnail.
  7. Write JS in the <script> tag so that when a user clicks on a thumbnail:
    1. Update main image to clicked thumbnail image.
      1. Hint: Refer to this article to see the various traversal properties. Use console.log() to log out different traversal properties.
    2. Update main image’s alt attribute to clicked thumbnail’s alt attribute.
    3. Update the caption below the main image to the clicked thumbnail’s alt attribute.

Sample

Submission/Upload to the server

Please follow the submission requirements below carefully. You will be deducted points for not following submission requirements to the teeth.

  1. Open a browser and go to https://303.itpwebdev.com/cpanel (it will redirect you to https://54-148-150-30.cprapid.com:2083/).
  2. Login with your username and password (this password does not sync with your USC NETID password. You set this password in Lab 1. If you don’t remember your password, post on EdStem and a course staff member will reset it for you).
  3. Scroll down to Files section and click on File Manager. You will see a list of folders and files like below.
  4. Double click to navigate inside the public_html folder.
  5. Create a new folder inside the public_html folder by clicking on the +Folder button on the top left.
  6. Name the folder lab04. Double click it to navigate inside this folder.
  7. Click on “Upload” to upload all assignment4 files to this folder.
  8. Drag and drop all assignment files to upload into this folder.
  9. In your browser, go to http://303.itpwebdev.com/~yourusername/lab04/gallery.html to check that the assignment file has been uploaded correctly.
  10. One last thing. In your computer, open up student_page.html that you created in Lab 2. Add a link to this assignment to student_page.html under the heading “Assignments” so that the graders can easily access your completed assignment.
  11. Re-upload the updated student_page.html to the itpwebdev server via cPanel -> Files -> File Manager. If it asks you want to overwrite the previous file, click Yes.
  12. If all the above is completed, go to your student page at http://303.itpwebdev.com/~yourusername/student_page.html and check that the link to this assignment is there. The TAs/graders use this link to access your assignment so make sure this is working! Below is a screenshot sample of what it should look like.
  13. (Optional) If you are having trouble uploading to the server and cannot upload on time, add all files for this assignment in a folder, compress it as a .zip file and upload it to Blackboard. On Blackboard, go to Assignments/Labs -> Lab 4: Photo Gallery. You will get some points deducted for not uploading correctly but at least you will not get a zero.