Overview
This assignment will help you practice JavaScript basics. The HTML and CSS is provided for you. You only need to write JavaScript to implement all the interactivity.
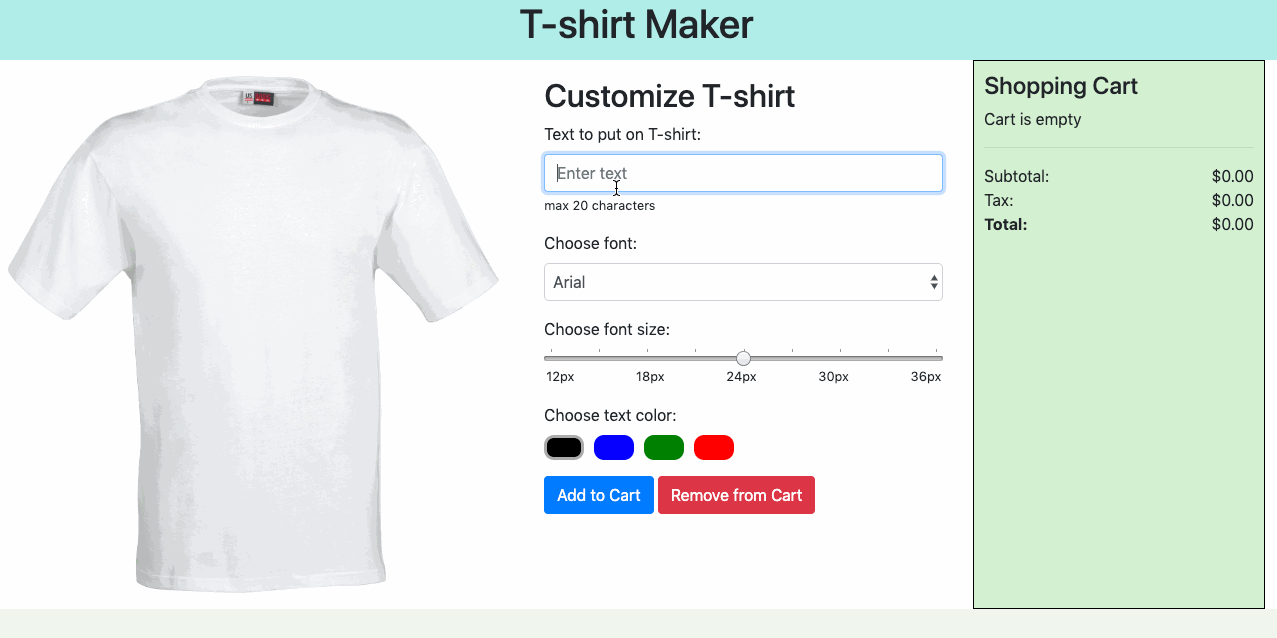
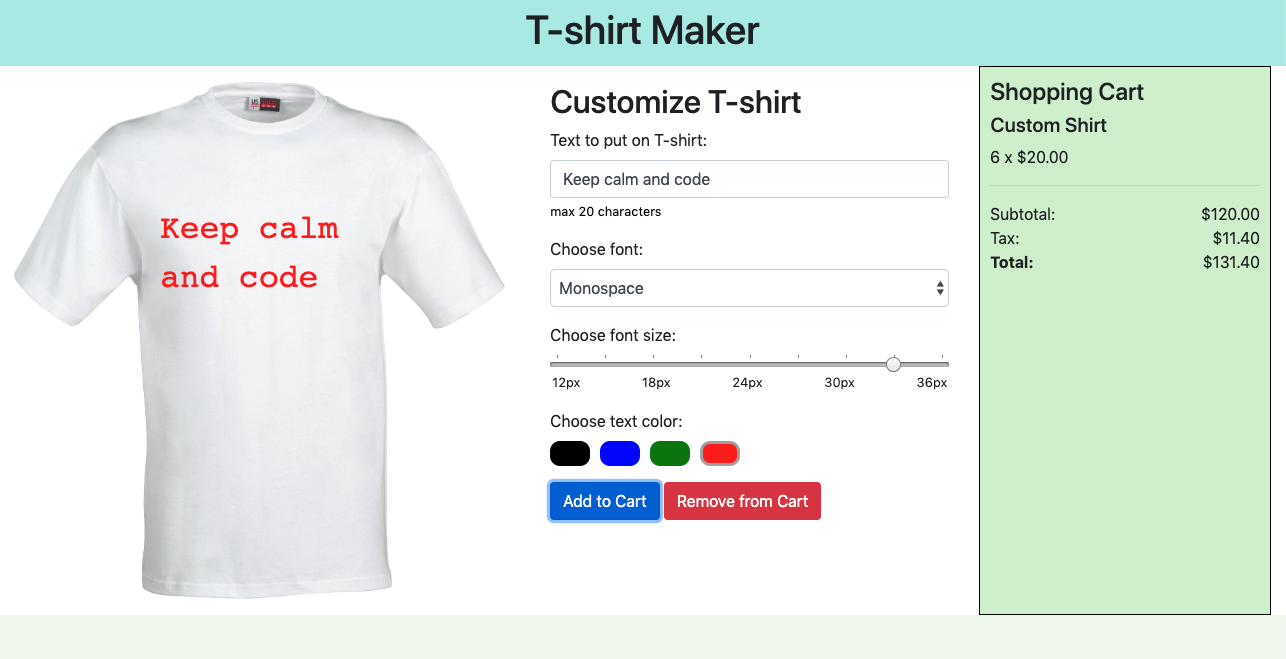
Sample
Requirements
Setup
- Download starter files (dropbox link).
- Write all JavaScript in the included .html file.
- Do NOT modify the HTML.
- You can complete this assignment without modifying the included external CSS file but you may modify it if needed.
- Note: The starter file utilizes Bootstrap CSS classes.
- Do NOT write inline JavaScript.
- Open up the Inspect tool as you work on this assignment. Use the Console to catch errors and use the Elements tab to see how the HTML elements change.
Customizer
- Text to put on T-shirt
- As user types text into the text field, display the text in
<div id="tshirt-preview">. The div is already positioned for you so you do not need to modify any CSS. - If user types in more than 20 characters:
- Change the message “max 20 characters” text color to red and add a CSS class
.is-invalidto the text input..is-invalidis a Bootstrap CSS class that automatically gives a red border around the input.
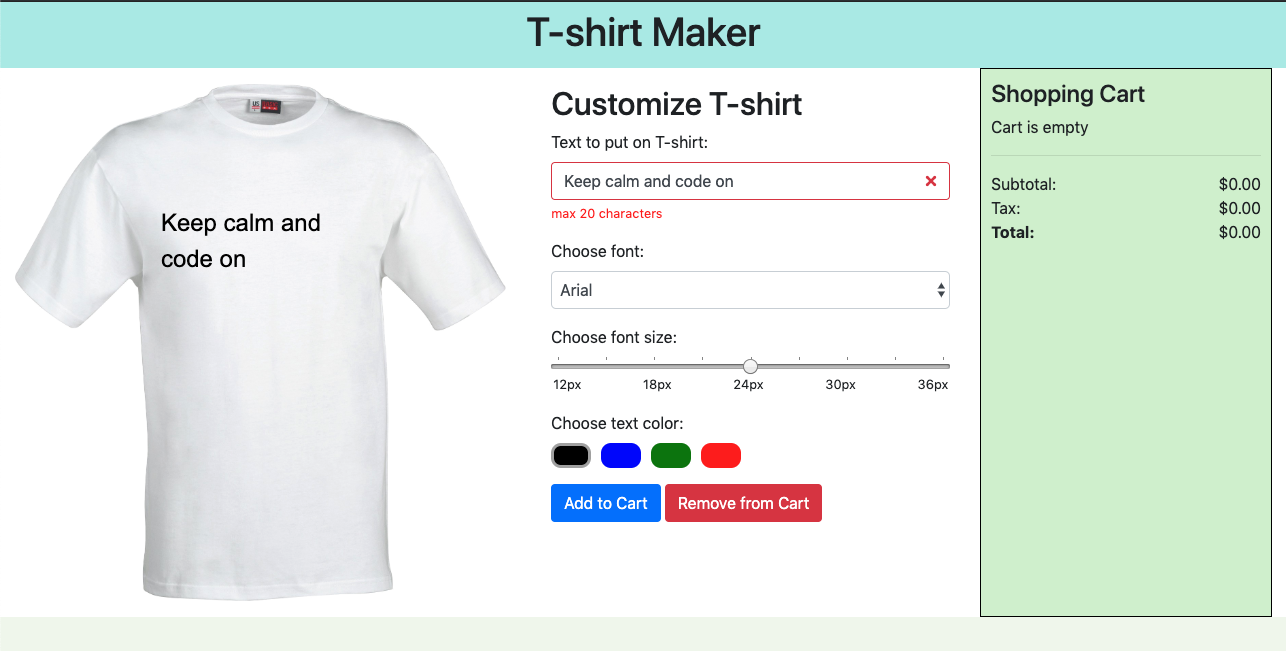
- Change the message “max 20 characters” text color to red and add a CSS class
- As user types text into the text field, display the text in
- Font, font size, and text color
- When user selects a different font in the dropdown, change the t-shirt font to that font.
- Use onchange event to detect change in the dropdown and slider.
- When user changes the font size slider, change the t-shirt font size to that size.
- When user clicks on one of the text color boxes, change the t-shirt text color to that color AND add a gray border around the color box that was clicked on (add CSS class
.selectedto it).
- When user selects a different font in the dropdown, change the t-shirt font to that font.
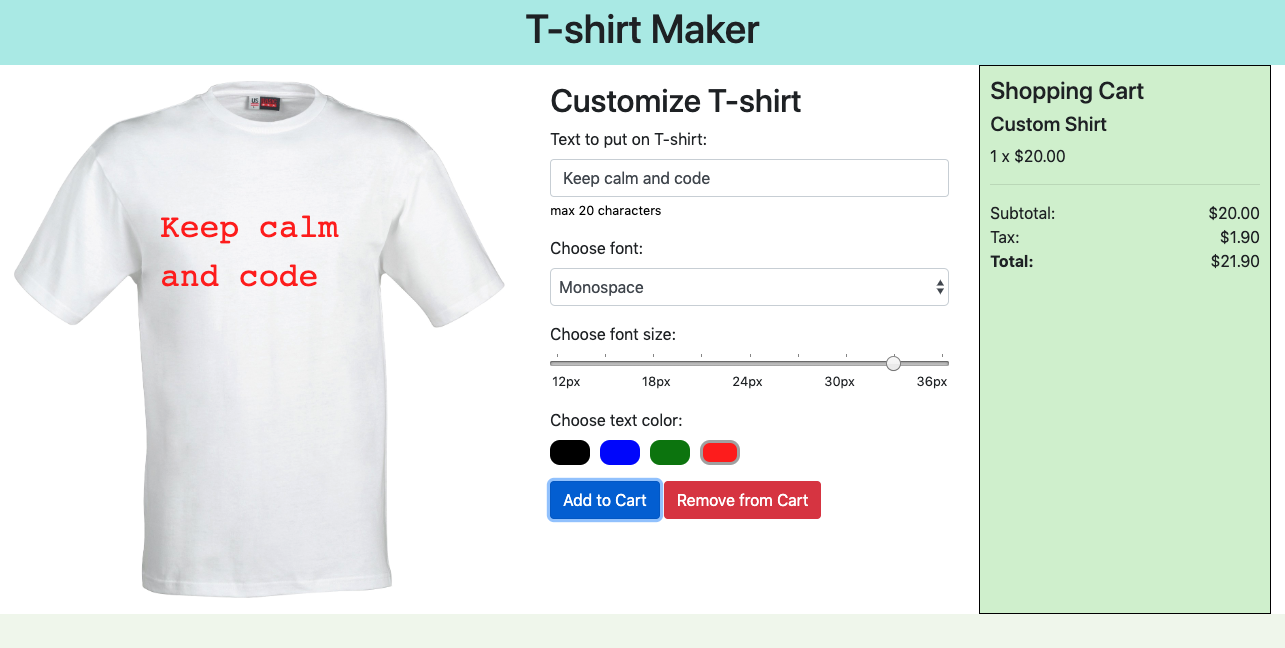
Add to Cart
- When user clicks “Add to Cart”:
- Validate that “Text to put on T-shirt” input field is not empty and is not have longer than 20 characters. Show a red error message below the button and add
.is-invalidclass around the text input to display a red border around it. Do not update the shopping cart if validation rules are not met.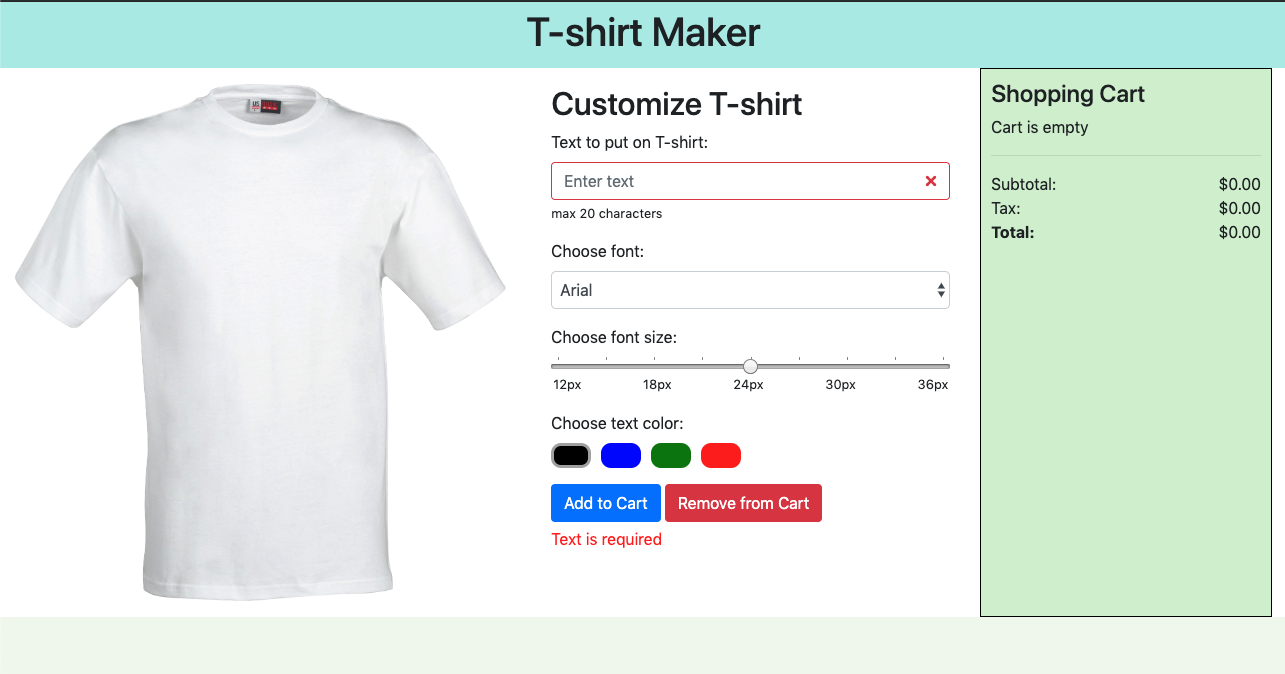

- Shopping cart: hide the “Cart is empty” message if above validation rules are met.
- Shopping cart: show the t-shirt information that is in the
<div class="cart-item">. - Shopping cart: Update the subtotal, tax, and total fields accordingly.
- Each shirt base price is
$20.00. - Tax rate is
9.5%. - In JavaScript, calculating floating points are not always accurate (e.g.
0.1 + 0.2does not equal to0.3). There are ways to go around this issue but for this assignment, it is OK if not exact results are returned. - Use .toFixed() to set two digits after the decimal place. There are known rounding issues with
.toFixed()but it is OK if rounding is a little off in this assignment.
- Each shirt base price is
- Shopping cart: Update the quantity by one every time user clicks “Add to Cart.” Subtotal, tax, and total must be recalculated every time the quantity is updated.
- Validate that “Text to put on T-shirt” input field is not empty and is not have longer than 20 characters. Show a red error message below the button and add
Remove from Cart
- When user clicks on “Remove from Cart”:
- Shopping cart: show the “Cart is empty” message.
- Shopping cart: hide the shirt information
- Shopping cart: Reset the Subtotal, Tax, and Total to 0 (zero).

Submission/Upload to the server
Please follow the submission requirements below carefully. You will be deducted points for not following submission requirements to the teeth.
- Open FileZilla and connect to the itpwebdev server as you have done in Lab 1 (click File -> Site Manager). If you forgot how to connect, follow this guide on how to connect and upload files to the itpwebdev web server.
- After you have successfully connected to the itpwebdev server, created a folder (aka directory) named
assignment4inside thepublic_htmlfolder. Then upload this assignment HTML file and images to theassignment4folder. Refer to the guide if you’re not sure how to upload the assignment file. - In your browser, go to
http://303.itpwebdev.com/~yourusername/assignment4/tshirt-customizer.htmlto check that the assignment file has been uploaded correctly. - One last thing. In your computer, open up
student_page.htmlthat you created in Lab 1. Add a link to this assignment tostudent_page.htmlunder the heading “Assignments” so that the TAs can easily access your completed assignment. - Upload the updated
student_page.htmlto the itpwebdev server via FileZilla inside thepublic_htmlfolder. If it asks you want to overwrite the previous file, click Yes. - (Optional) If you are having trouble uploading to the server and cannot upload on time, add all files for this assignment in a folder, compress it as a .zip file and upload it to Blackboard. On Blackboard, go to Assignments -> Assignment 4: T-Shirt Customizer. You will get some points deducted for not uploading correctly but at least you will not get a zero.