Overview
This assignment will help you get more practice with PHP syntax, form variables, and conditional statements
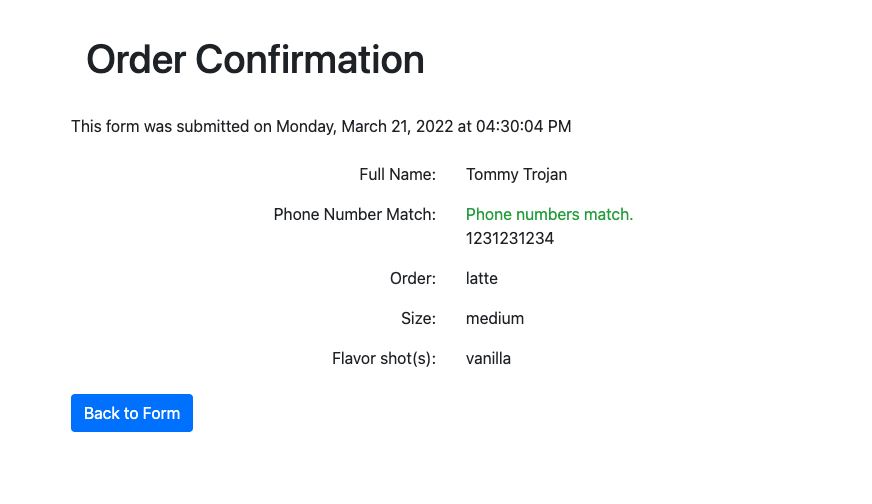
Sample
See working sample here: http://303.itpwebdev.com/~ta303/samples/lab-php-form/form.php
Requirements
- Download starter file.
- Form Page (
form.php)- Fill out
<form>tag’s action and method attributes appropriately. - When this form is submitted, it will run
submit_form.php.
- Fill out
- Form Output / Submission Page (
submit_form.php)- Perform all validation as needed.
- If any of the fields are not filled out (except Flavor), display “Not provided” message in red.
- Tip: The provided HTML pages are using Bootstrap. Therefore, you can use CSS class
text-dangerfor red text and the classtext-successfor green text.
- Show a message with current date & time in following format:
- This form was submitted on [weekday], [month] [day], [year] at [time].
- Example: This form was submitted on Sunday, September 17, 2017 at 03:15:14 PM.
- For the hour, use 12-hour format (not 24) with leading zeros.
- Use Los Angeles timezone.
- Refer to the PHP official documentation and search for the
datefunction to see how to get the formatting exactly right.
- This form was submitted on [weekday], [month] [day], [year] at [time].
- Display following values in
submit_form.phpafter the form is submitted:
- Submission
- When completed, you will need to upload this page to the itpwebdev server via FileZilla (like you have done for labs/assignments earlier in the semester).
- Connect to the itpwebdev server on FileZilla. Create a folder named
lab09and upload all files to this folder. - In your browser, go to
http://303.itpwebdev.com/~yourusername/lab09/form.phpto check that the assignment file has been uploaded correctly. - One last thing. In your computer, open up
student_page.htmlthat you created in Lab 1. Add a link to this assignment tostudent_page.htmlunder the heading “Assignments” so that the TAs can easily access your completed assignment. - Upload the updated
student_page.htmlto the itpwebdev server via FileZilla inside thepublic_htmlfolder. If it asks you want to overwrite the previous file, click Yes.
- Perform all validation as needed.